Cómo remover fondos en Photoshop
Publicado por Hayden Aube el
En este tutorial fácil de seguir, mostramos cómo quitar el fondo de cualquier imagen utilizando Adobe Photoshop.
Antes de empezar, echa un vistazo a Trace, nuestra nueva herramienta de borrado de fondo. Quita los fondos de las fotos instantáneamente, y podría ahorrarte mucho tiempo.
Para obtener mejores resultados:
- Encuentra una imagen de alta resolución; cuantos más píxeles, más preciso puedes ser.
- Asegúrate de que el sujeto resalte sobre el fondo y que no compartan demasiados colores o texturas similares.
Paso 1
Abre tu foto en Photoshop y crea una nueva capa de fondo.

En esta nueva capa de fondo ve a editar, rellenar y luego selecciona el blanco para los contenidos.
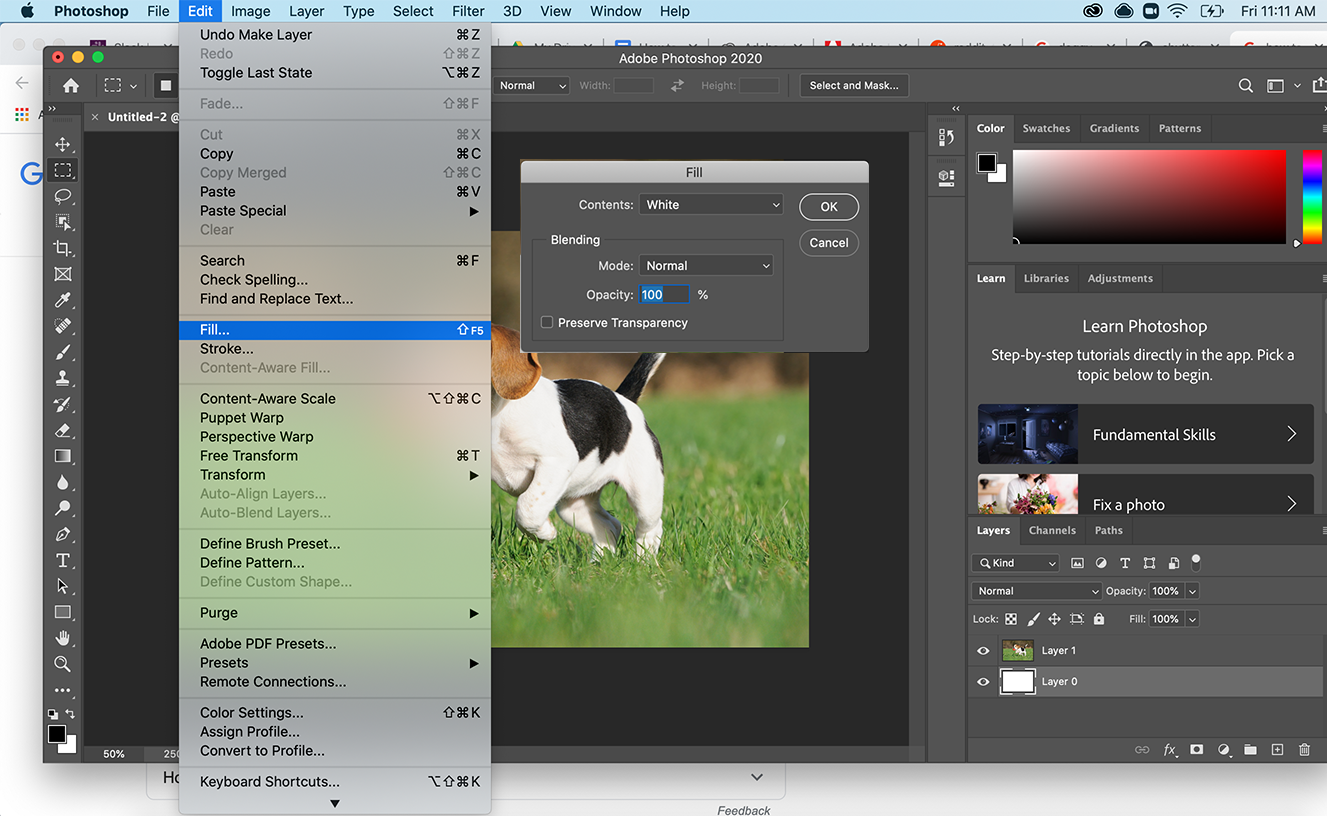
Coloca esta capa debajo de tu foto para que al eliminar el fondo original se revele el blanco debajo.
Si tu foto es una capa de fondo bloqueada, no podrás arrastrar otra capa debajo de ella. Todo lo que tienes que hacer es hacer doble clic en ella, darle un nombre y pulsar Intro para convertirla en una capa normal y así poder mover cosas por debajo de ella.
Paso 2
Agarra la herramienta de selección rápida y empieza a arrastrar la pieza que quieres conservar.
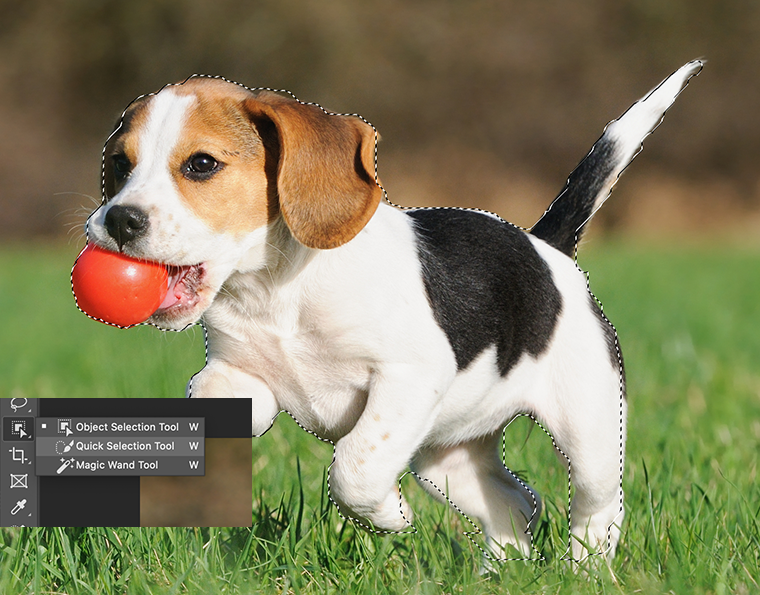
El tamaño de tu pincel determina cuánto se agarra con cada clic o cada arrastre del ratón. Para cambiarlo, usa los corchetes abiertos y cerrados para que el pincel sea más grande o más pequeño según la precisión que necesites.
Es probable que al realizar la selección resaltes áreas que no deseas. Cuando esto ocurra, simplemente mantén pulsado alt mientras utilizas la herramienta y ésta restará de la selección en lugar de añadirla.
La herramienta varita mágica así como la herramienta de selección de objetos también pueden ser útiles aquí. Comprueba estas herramientas si es necesario.
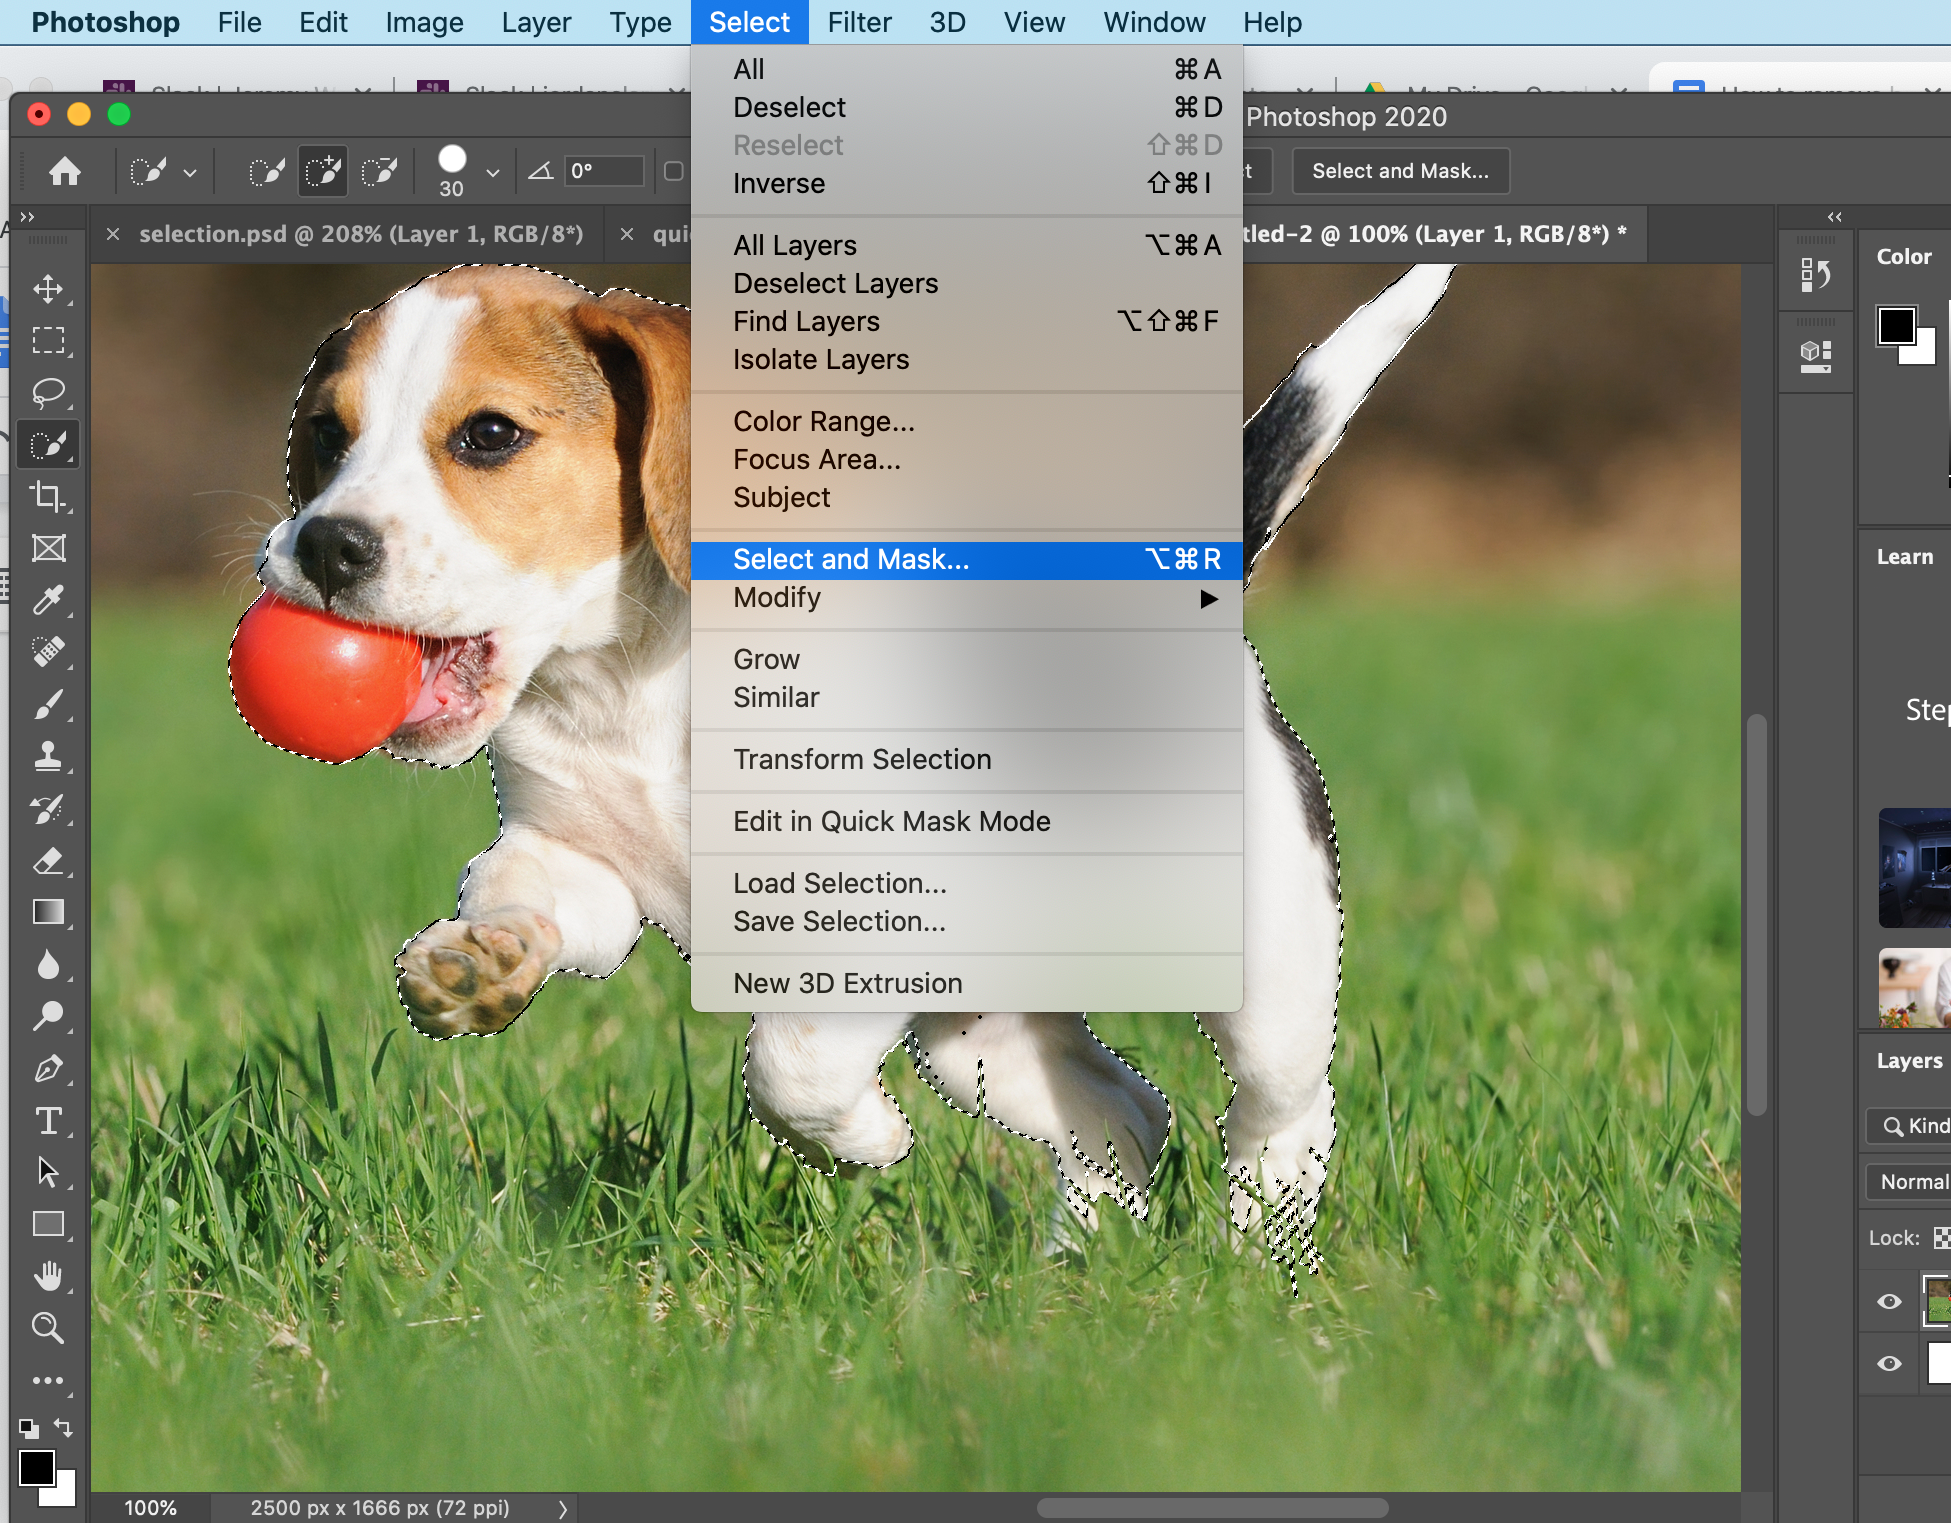
Paso 3
Una vez que hayas hecho un trabajo bastante bueno en la selección de tu objeto sobre el fondo, vamos a refinarlo yendo a seleccionar y luego a seleccionar y enmascarar.
Asegúrate de que la transparencia se establece al 100%. Esto te mostrará cómo se verá tu selección actual una vez que se haya enmascarado del fondo original.
También asegúrate de que la vista previa de alta calidad esté activada.
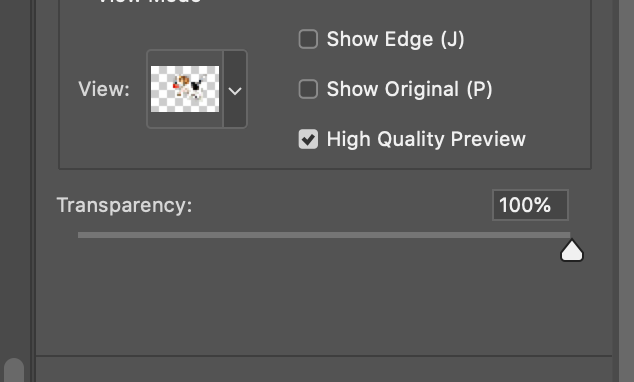
Ahora puedes ver el fondo blanco temporal que hiciste mostrando por detrás.
Si ves un ligero contorno gris, estos son algunos de los elementos de fondo que has recogido al usar la herramienta de selección rápida.
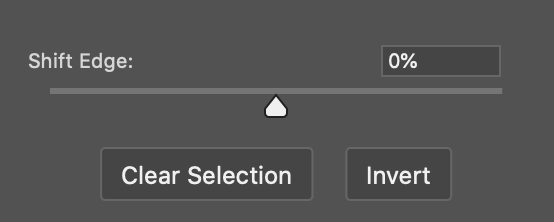
Para eliminarlo, usa 'shift edge'. Esto expandirá tu selección o la hará entrar. Los números negativos desplazan el borde hacia adentro y los positivos hacia afuera.
Paso 4
No cambies mucho de lado. Para lugares con detalles intrincados como el pelo o la piel, utiliza la herramienta de cepillo "refinar el borde".
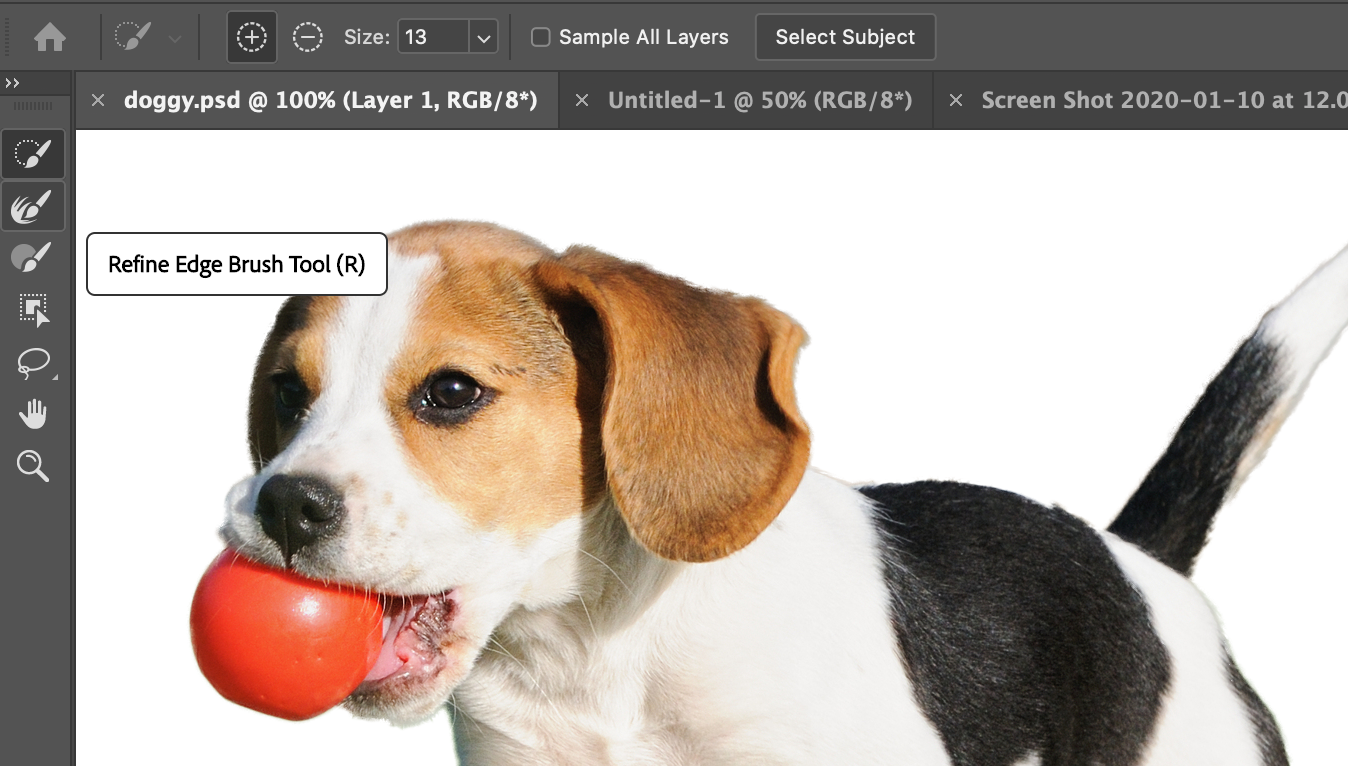
Arrastra a lo largo de los bordes donde se encuentran los detalles. Perderás un poco de ese fondo y se verá más como un recorte correcto. Al igual que con la herramienta de selección rápida, puede cambiar el tamaño de este pincel con las teclas de corchetes.
Por último, si encuentras que, en general, tu selección es un poco dentada o que hay demasiados bordes afilados, puedes utilizar un pincel liso o plumoso para arreglarlo.
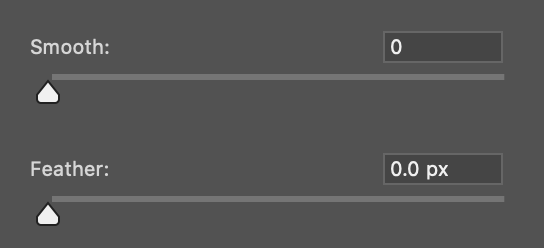
Sólo ten cuidado de no añadir demasiado, ya que todavía quieres que tu selección se vea nítida en lugar de borrosa en los bordes.
En cualquier momento mientras estés en el modo de selección y de máscara puedes pulsar P para alternar entre lo que has empezado y donde te encuentras ahora.
Pulsa OK.
Paso 5
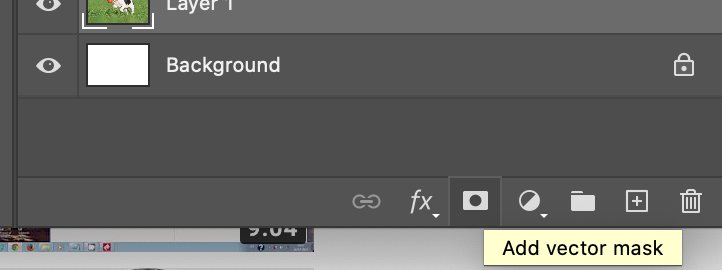
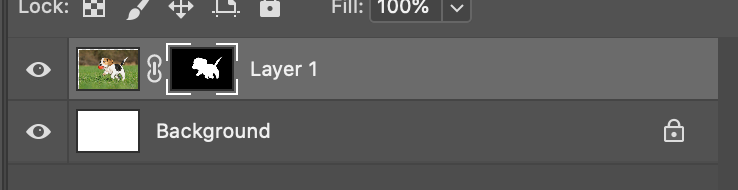
En lugar de eliminar el fondo alrededor del sujeto, enmascare el mismo.
Con la selección todavía activa, ve al menú de capas y pulsa añadir máscara de capa.
Las máscaras de capa funcionan en blanco y negro: el negro significa ocultar esta parte, el blanco significa mostrar esta parte. En este momento queremos mostrar el sujeto (blanco) y ocultar el fondo (negro).
En cualquier momento, si queremos hacer la misma selección sólo tenemos que hacer Cmd + clic o Alt + clic en la máscara de capa.
Ahora deberías poder mover esta capa. El objeto está ahora separado de su fondo original.
Paso 6 (opcional)
Si crees que hay un par de áreas problemáticas que quieres limpiar, puedes hacer clic en la máscara de capa en tu panel de capas y añadir o quitar algo del fondo original. Usa la herramienta de pincel en blanco o negro para quitar o añadir detalles.
¡Este es el final del tutorial!
Si quieres una forma más fácil y rápida de quitar los fondos, echa un vistazo a nuestra nueva herramienta Trace. Trace es de uso gratuito y funciona al instante.
Comentarios