How to design mailers
Posted by Sticker Mule on
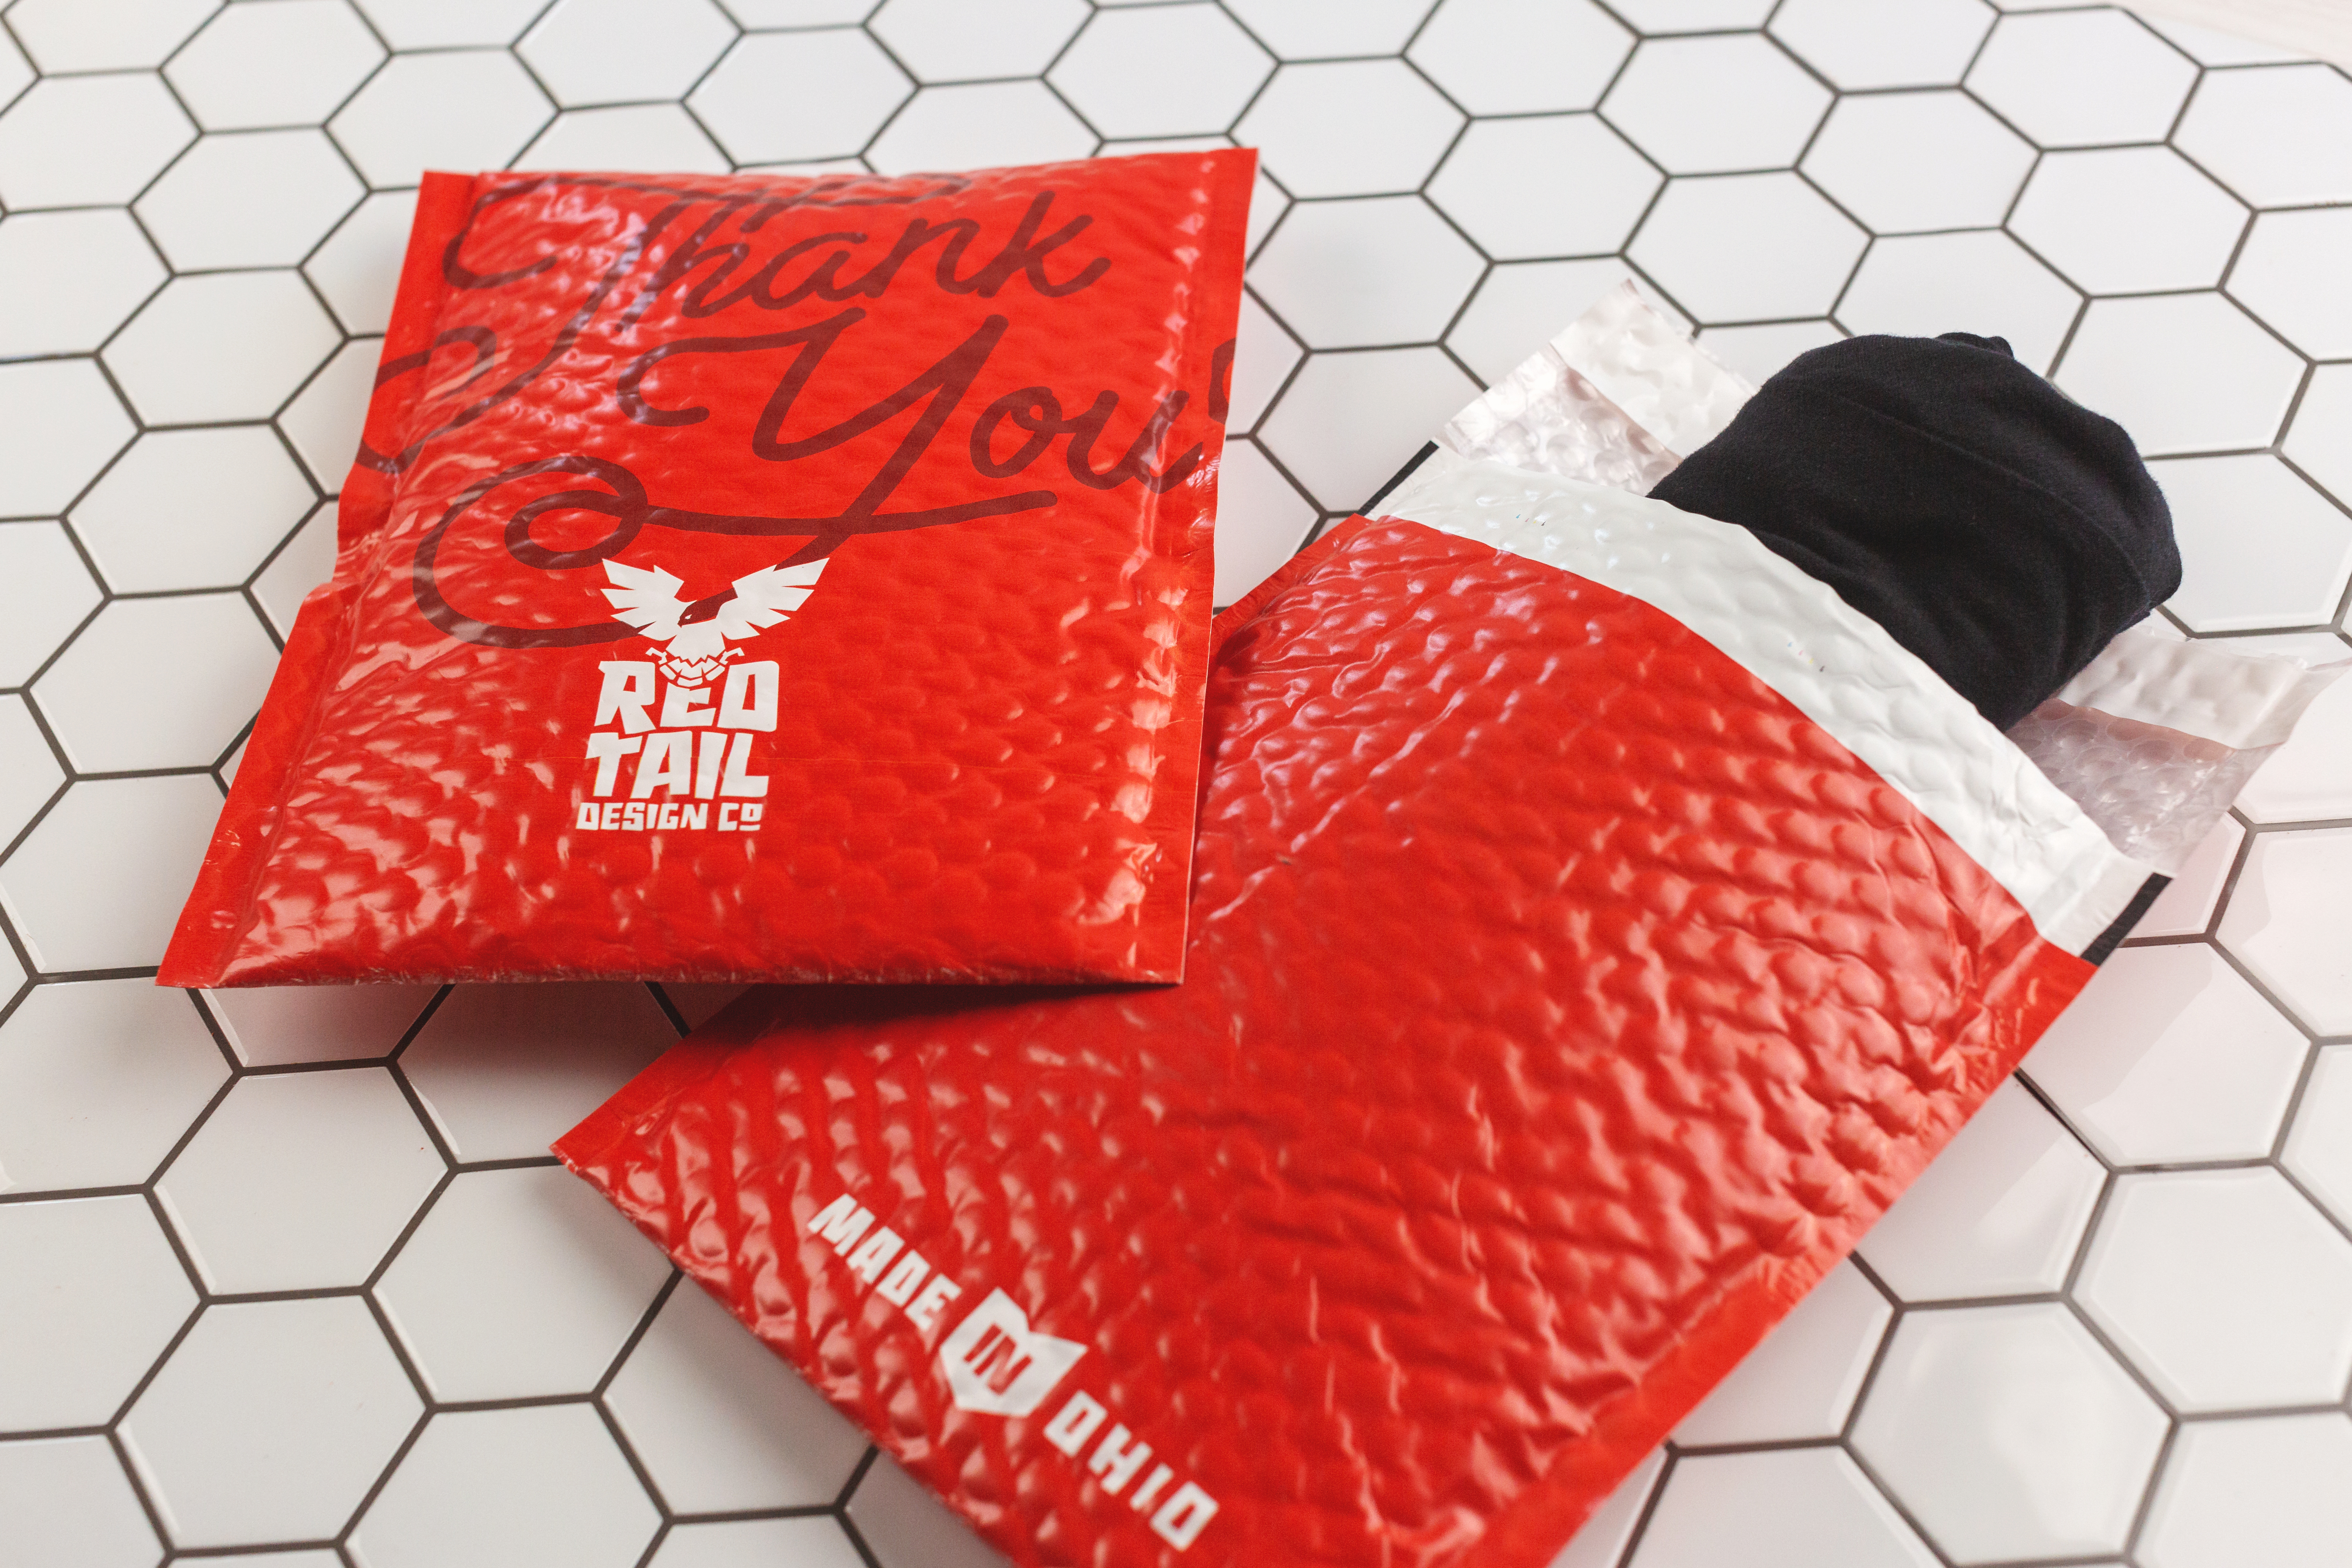
Poly mailers and bubble mailers are great options for shipping physical goods. They're lightweight, weather-proof and great for showing off the personality of your brand.
But your packaging is only as good as your design. Here are some tips for designing custom mailers.
In this tutorial, we’ll be using Adobe Illustrator as well as online design tools like Studio – to help make our custom mailers as reality!
Design the mailers for free online with Studio

To get started using Studio to design custom mailers;
Head on over to Studio's poly mailer category of free online templates
Decide on a template to use
Press "start designing"
Customize the mailer online for free
Press "Order print" on the top right corner to get your custom mailers printed and delivered to you!
That's all it takes! Try it today to see how simple it is to design your own custom mailers with Studio.
Design mailers in Illustrator
Download a mailer template
First, we need to download the appropriate template. This will ensure that our artwork not only is set up to the correct size, but that nothing gets cropped off by the poly mailer's white border.
Click here for poly mailer templates.
Click here for bubble mailer templates.
Bubble mailers offer more insulation and protection than standard poly mailers, but the design process for each is the same.
Designing your mailers
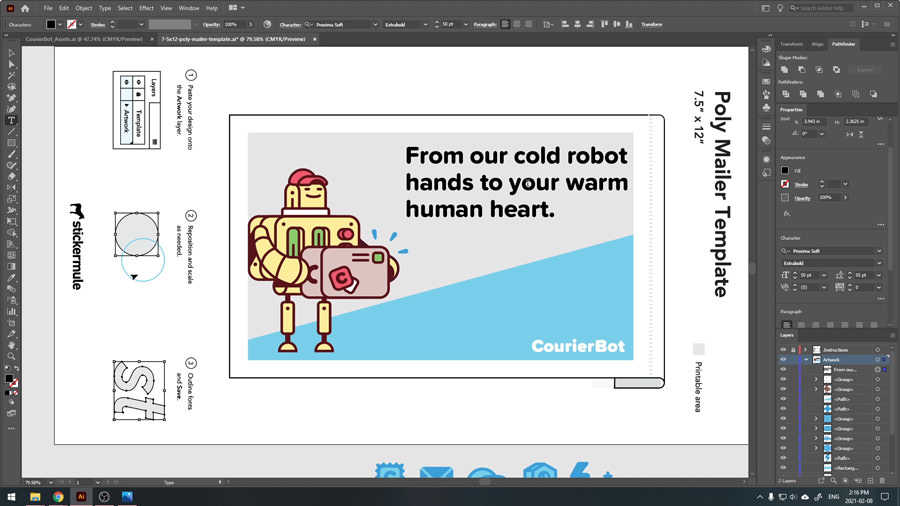
In this tutorial, I'll be using the smallest sized mailers. Once our template is downloaded, we can open up Adobe Illustrator. In this demonstration, we will be creating a horizontal design. Because of this, our first step will be to rotate the template. Start by going to the artboard tool, making sure your art board is selected and then changing the layout to horizontal.
Next, we need to rotate the actual template. So unlock the instructions layer, select everything. And then while holding shift, rotate the template. Be sure to relock the instructions layer afterwards so that you don't place your artwork in the wrong place. If you're also working with a horizontal design, be sure to make note of which side you want the opening of the mailer to be on. In our case, it'll be on the right. Now with everything set up, we can begin laying out our design.
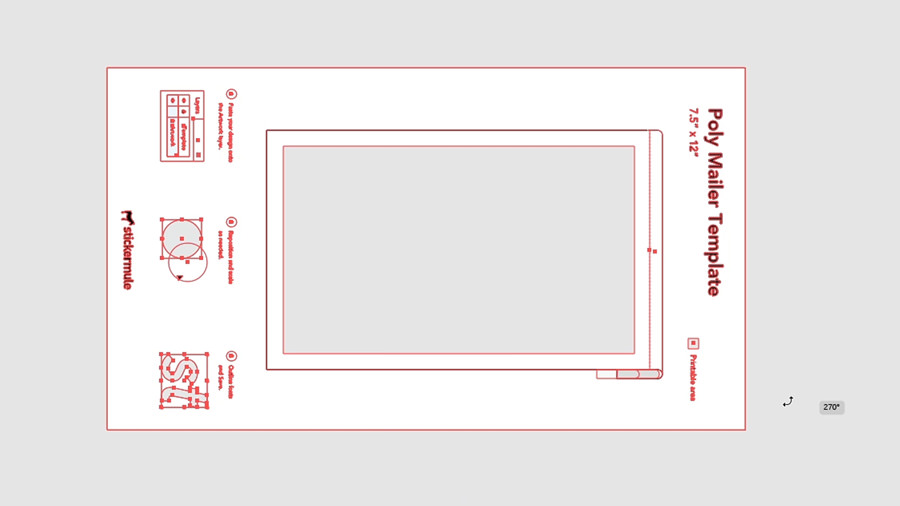
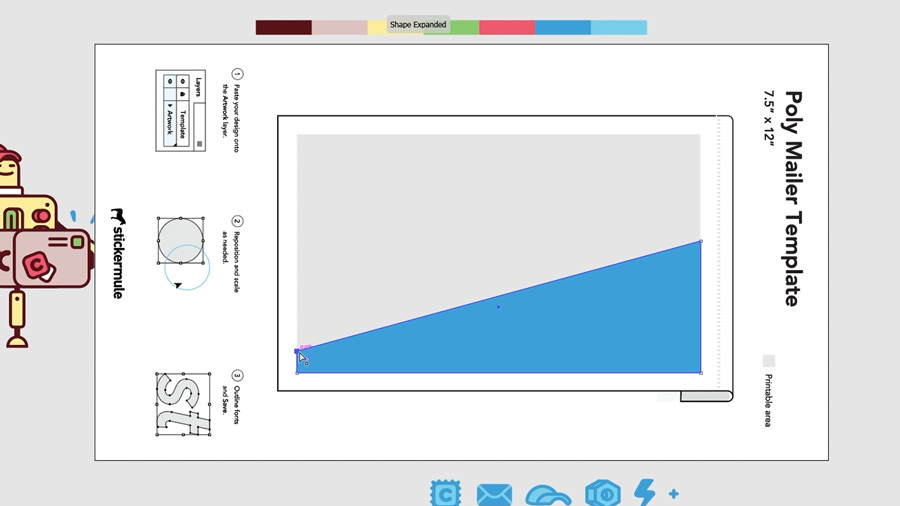
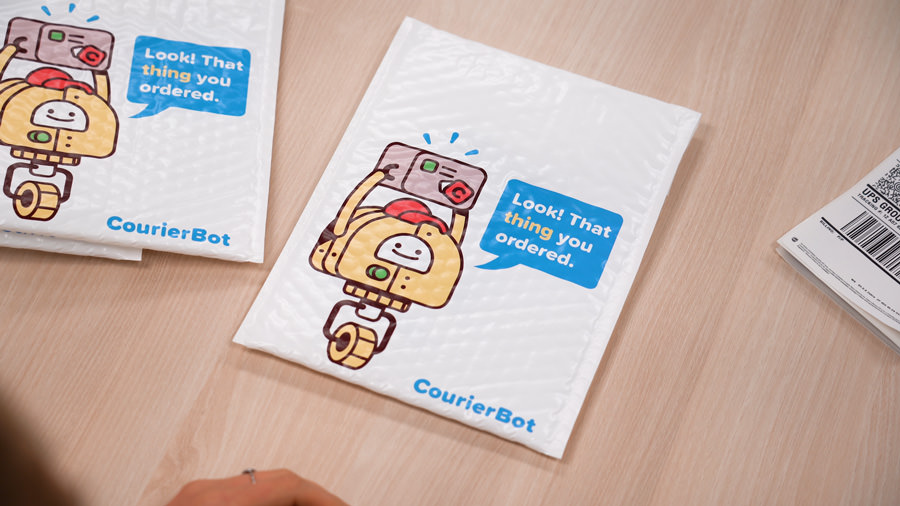
Ours will feature a character, a logo, some text, and a pattern. So to begin, we're going to bring in a few brand elements and put them on the artwork layer. Something you may notice right away is that designs get cropped if they fall outside of the gray box. This represents the printable area. Since poly mailers are printed with a white border, use this as a guide to make sure that nothing important gets cut off. It's also worth noting that the gray box itself won't be printed. So keep it in mind as you're designing that everything behind your artwork will be white.
First, we're going to create a blue rectangle-like shape along the bottom of the mailer. This will hold our logo and our pattern, and it's going to follow the white border that the poly mailer gives us. An easy way to do this is to create a rectangle, then use the direct selection tool to move just one of the anchor points lower. This is what we're after. Let's give it a light blue fill using one of our brand colors.
Next we'll place our robot character so that it looks like he's standing on this shape. By right clicking and going to a range, we can bring him to the front. He may be a bit too large, so we'll just bring him down a touch as well. And we'll just nudge him over to the side of it and get him right where we want him. Notice how the left side of this character is being lined up right along the border of the printable area, but not going past it. This is to make sure that the character lines up with our wedge shape at the bottom, but isn't cropped off by the white border.
Now let's place the logo. So we'll again, arrange it and bring it to the front. And we're going to give it a white film. Now, we want to position it in the bottom right corner, but first we're going to shrink it a bit and line it up with the bottom of our character's feet. We may want to add some more space around the logo later on, but for now, this works. Next, we're going to include some text. This is a great opportunity to inject some personality into the design. Ask yourself, "What would be a fun message for your customers to read?" For the CourierBot brand, we're going to play around with this idea of robots delivering packages to people. Now for CourierBot, we already have a font selected and that's Proxima Soft, extra bold. And since this is clearly too small, we're going to bump it up to 50. Now we'll add in some line breaks and set the letting to something a bit smaller. Perfect.
Once we have the text arranged how we'd like it, we're going to add some brand colors to it. So for the majority of the text, we'll be using the brown, but we're going to select a couple of keywords and add additional colors. It only seems suited to have cold robot hands as blue and warm human heart as red. Just like that.
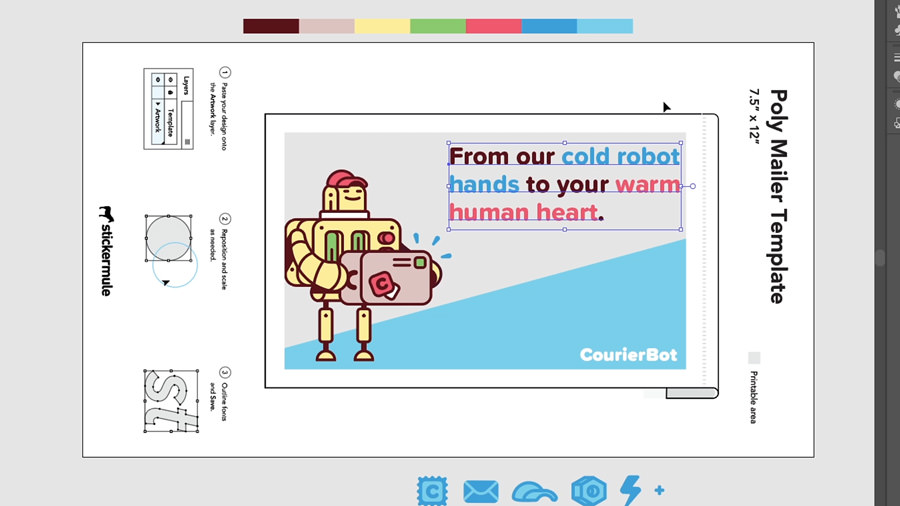
We're also very carefully going to place the block of text right in the corner of the printable area. That way it should line up with our rectangle shape at the bottom. We're not finished yet, but this is a good place to double check that we're happy with the placement of all of our elements. One way to do this is to create a rectangle that's the size of the entire printable area, and then give it a white fill. Now, if we place this rectangle behind the rest of our artwork, we're going to get an idea of what the final printed mailer is going to look like. In the case of our design here, we're just going to make a couple slight adjustments to give some more breathing room to some of the elements and to make sure they're lined up exactly as we'd like.
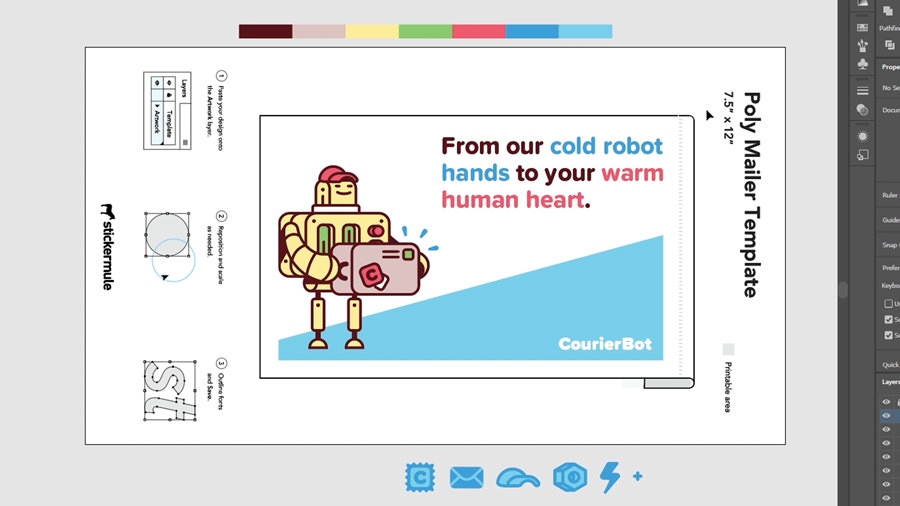
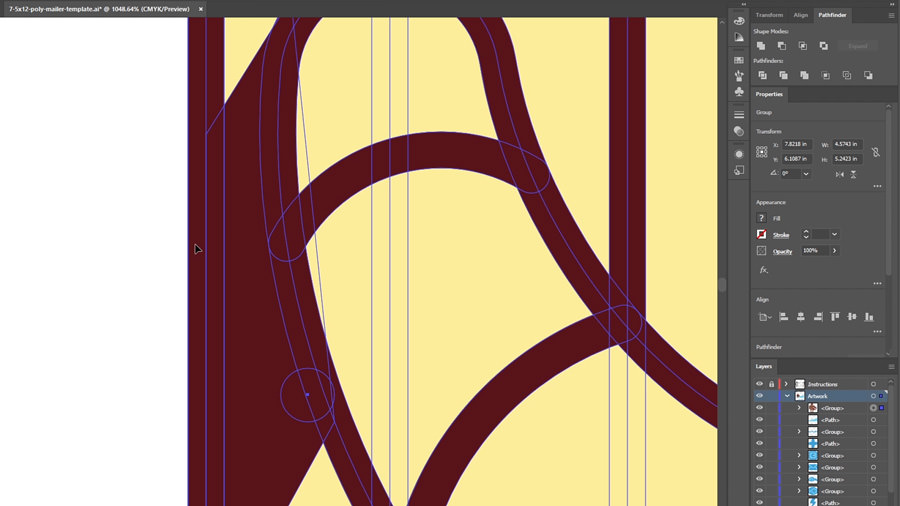
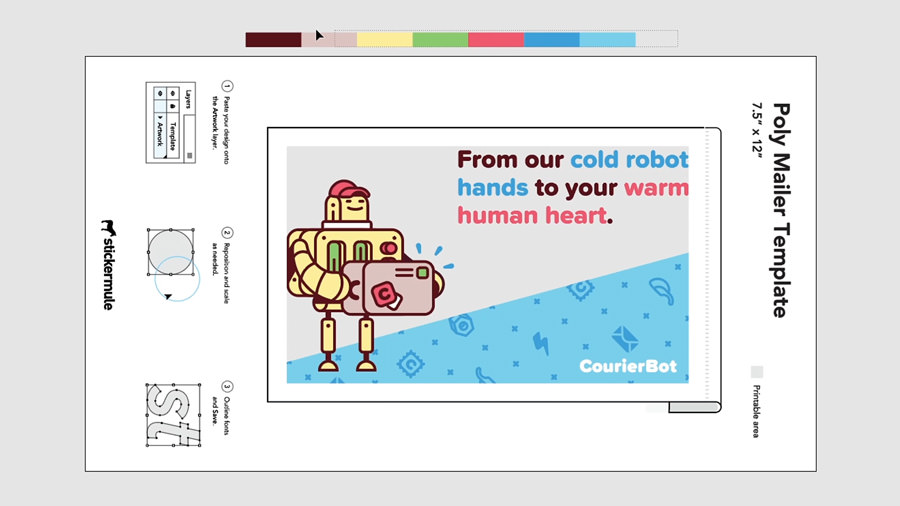
Now that we're happy, we can remove that rectangle. It's important that any texts be outlined before sending off to print. Since we're happy with the current layout of ours, it's a good time to do that. Just right click the text and select create outlines. The final step we're going to take in this design is adding a pattern to our light blue shape. This will take some finessing, so we're going to speed through most of it.
Once our design is complete, all we need to do is rotate everything back to the original orientation. So grab the art board tool, unlock the instructions layer, switch the orientation back to portrait and then rotate all of our artwork once again. Now let's save our hard work and we're ready to send our design off to print.
Feeling stuck for ideas?
Here are some other layouts that were great as mailers. Hopefully, they can help inspire your own.
If you don't want to have an obvious white border on your mailer, consider placing it on a white background like we've done here.
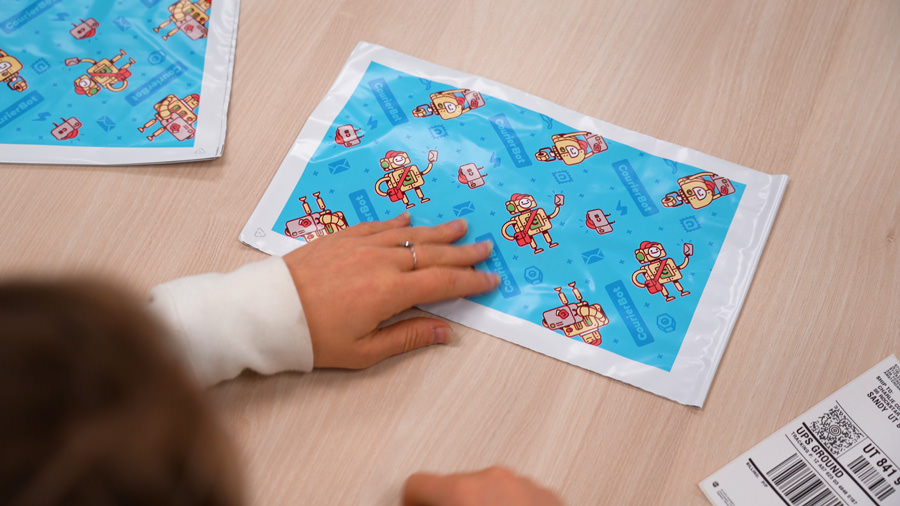
Or if you don't want it to matter which angle your package is viewed from, consider a pattern approach, like this.
When in doubt, you can always submit your design as is to Sticker Mule and receive a proof of what it's going to look like. If something doesn't seem right, just request a change and we'll be happy to make it for you.
Comments