How to save time and money with creative packaging
Posted by Pam Neely on
Most online crafters don’t need to be told what branding is. They know it intuitively. They framed their branding as they developed their products. They put it in writing when they got a logo and a business card.
But what about a product’s shipping box and packaging? If you’re an online crafter, you probably already get that this is another aspect of branding. It’s not just a fulfillment cost. The packaging you use is the first real life experience your customers have with your brand.
What is that experience going to be?
You want to make an impression, obviously. But you’re also in business. So while it might be fun to make every package into a work of art, that’s not realistic. Your time and money are limited.
You need to deliver a package that is:
Durable
There’s no worse branding experience than receiving a package that’s been pummeled in the mail.
Attractive
Our expectations frame our experiences. If your packaging is appealing, your customers will have a pre-set expectation that your products will be appealing, too. This can reduce returns, increase loyalty, and even result in better product reviews.
Memorable
There's no shortage of competition, even for handmade goods. You want first time customers to remember your products and your packaging enough to buy again.
Efficient
Time is money. You can’t spend hours preparing each package. I’d guesstimate that any more than ten minutes simply isn’t feasible. Five minutes per package is probably the absolute max.
Affordable
It might be awesome to wrap your work in gold leaf… but you can’t. So how much is reasonable to spend on each package? 3-7% of your product cost is what most companies aim for, but 10% is not uncommon. And 10% is probably the number that most small-scale crafters should aim to beat. Limited budgets and small operations often mean you can’t buy in bulk. Also, because you’re a crafter, there’s an expectation that your shipping should be more distinctive than if you were shipping, say, batteries.
Here’s how those different percentages might break out for a $50 order:
- 3% of the product cost would give you a $1.50 packaging budget
- 5% would be $2.50
- 7% would be $3.50
- 10% would be $5.00
Let’s say you decide on 7%. That’s $3.50 of budget to package a $50 order. Impossible? Not at all. You can definitely keep the outside box to $1.50 or so. Judicious use of stickers and a custom stamp can turn a “boring” brown box into something reasonable cool and memorable, but also tough enough to survive even an abusive postal worker.
That leaves you $2.00 per package.
So what can you do with that? Quite a lot, actually. Take a look at what these three small online crafters have done with their packaging.
1. Pick a theme
Packages literally tie things together. So do themes.
Here’s how Love Bud Photography announces its work in the mail.
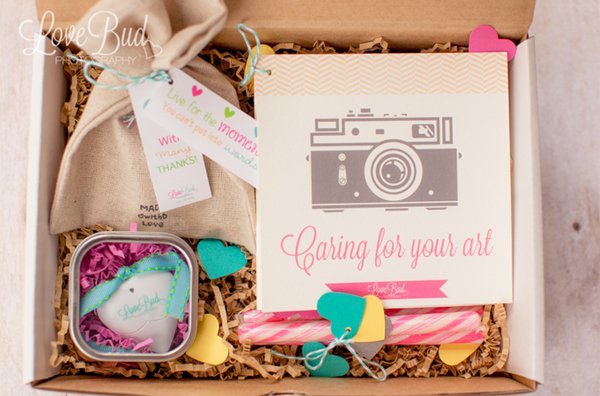
The party theme used here is an easy way to invoke celebration – and we want our customers to celebrate when they get their packages, right?
But the party theme is also a smart business move. You see, party supplies are easy to find. They’re inexpensive. And they come in hundreds of colors and variations. The hardest part about picking what to use will be to winnow down your options.
Just a few things to notice in this box:
1. The package filler.
Want to know the single best way to keep stuff from getting damaged in a shipping box? Make sure it can’t move around during transit.
That’s why so many people use box filler. And this particular box filler – the crinkled strips of paper – definitely has a party feel to it. It’s known as crinkle paper, and you can get a 10 lb box of it at Staples for $18, retail. With a third of a pound of that in each shipping box, you’d pay about 60 cents per box.
2. The printed card.
This serves a clever dual purpose. It’s an insert card you can use for loyalty or feedback (ask for an honest review) or another message. But it can also be a thank you card. You can get thank you cards printed up for ten cents or less each. Then write a quick thank you note to customize each package. That personalized touch is exactly the sort of thing people remember and share.
3. The confetti.
Using confetti in shipping packaging is pretty popular right now. But it makes sense. We all have fun associations with confetti, plus it’s colorful and cheap. It’s an easy way to add splash to a box for barely a dime per package.
Want another spin on the confetti idea? Here’s how The Bees Knees ships their honey.
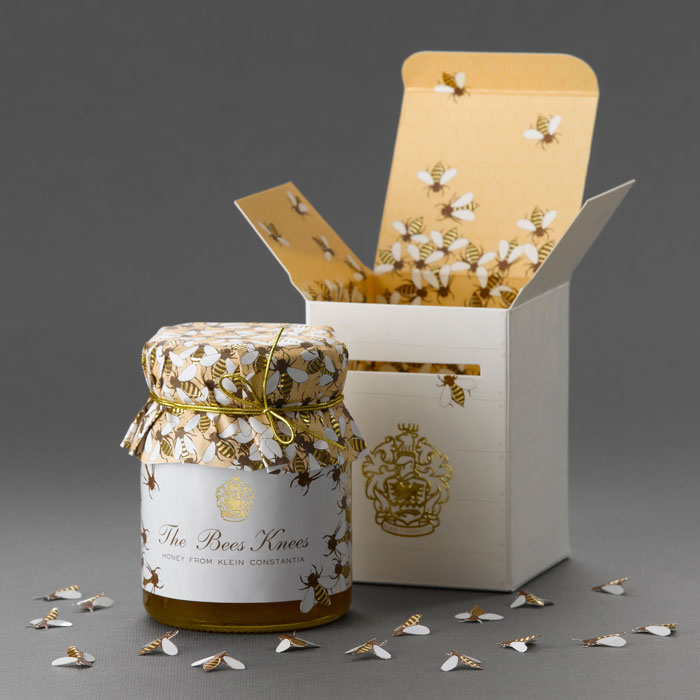
One quick comment on this, though. That glass jar will need protection during shipping. They might want to borrow some of Love Bud’s crinkled paper. Or use honeycomb packaging to expand upon that theme.
How much for that party in a box?
With those three things plus the shipping box, and we’re at $2.30 per box ($1.50 for the outside shipping box, plus 80 cents for the filler, the card, and the confetti).
That still leaves $1.20 of budget per box left. Enough to buy a bit of candy, like Love Bud has done here. Or to include some other small gift like the heart in a tin.
Want another twist on the party theme? How about skipping the crinkled paper and using half-filled balloons instead? They’re the party version of air pillows. You can get packs of 100 balloons for less than $6. You can even get them in a particular color, and nail another branding opportunity.
2. Use common materials in a creative way
This is the best secret for small shop packaging. If you can use common materials in a new way, you’ll:
- Save money
- Be memorable
Skip lots of sourcing headaches (because you can get your packing supplies just about anywhere)
My favorite example of this is…
The humble paper bag.
Here’s how the handmade craft company Nestled does theirs:
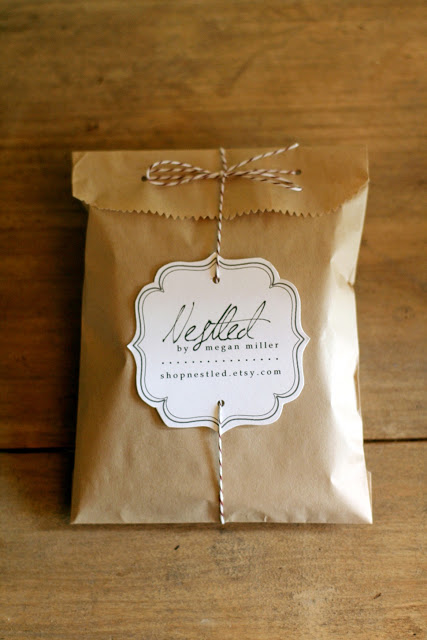
It’s simple, affordable, and appealing.
Here’s the cost breakout:
- The bag: 5 cents
- The twine: 5 cents
- The die-cut printed label: 20 cents (this is my estimate).
"Die cut" refers to the shape of this tag. Notice how it’s not a square? That’s why it’s so expensive. But Megan (Nestled’s owner) saved so much money with her other packaging materials that she can splurge a little on the label.
Total cost for this? 30 cents!
That leaves enough left over to possibly add another layer of protection for the jewelry inside. Add a sticker and a stamp and you’ve got a custom-printed package. Oops… getting ahead of myself.
3. Invest strategically in your printing
Yes – custom printing can be expensive. And yes – your budget is small. But that doesn’t mean you can’t do any custom printing. You just have to do it strategically.
One example of this? Custom tape.
A lot of cool little craft companies are using custom tape. No surprise, really. You have to use tape anyway to seal the box – might as well make it into a branding statement.
There’s two types of tape being used these days: Packaging tape (sometimes known as “Carton sealing tape”) for outside the shipping box and “Kraft” tape, which is suitable for lighter uses.
Rolls typically come in 55 or 100 yards. If you buy about 25 or fewer rolls, you’ll pay roughly $10 per roll. Buy more and the cost per roll goes down.
If you use one yard of tape per package, that’s about 10 cents of custom tape per package. Not bad, given how much of a statement it could make.
But you could go even cheaper. Here’s plain tape made marvelous with a custom stamp. It’s not suitable for packaging tape, but it would keep interior boxes and envelopes closed. And it makes for a very cool return address label.
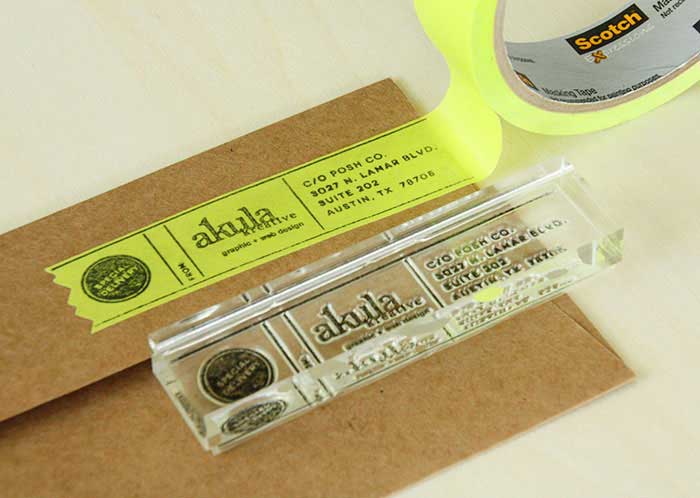
Custom stamps bring up a ton of other possibilities. They basically make you into your own print shop. Here’s how one coffee roaster packs their coffee:
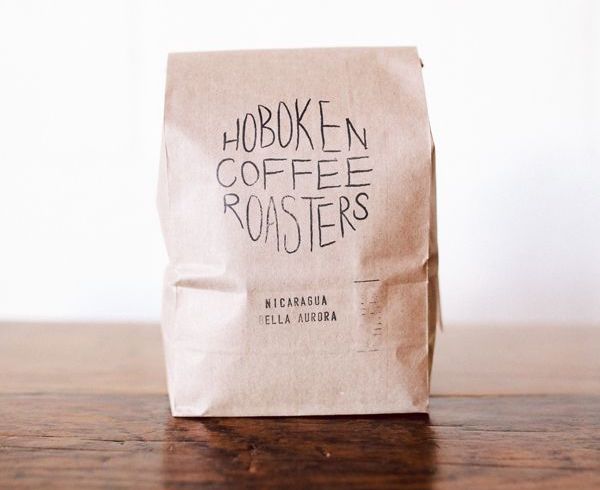
And there’s another paper bag…
Custom stickers, of course, work great too. They’re similar to stamps, but stickers can seal boxes (like custom tape does), which makes them dual use. And stickers can go on the outside of shipping boxes, too.
With all those options, you can save enough to be able to splurge on some custom printing. And it doesn’t always have to be a custom box, either. Custom printed poly mailers (aka “poly bags”) work well, too.
Conclusion
There’s absolutely no reason to give up on having cool packaging. Even if you’re on a shoestring budget. Especially if you're on a shoestring budget, actually.
Just be sure that whatever you use will hold up during shipping. And keep your package prep time to a minimum. That’s one area many handmade companies don’t estimate for properly. For instance, if you earn $20 an hour, and you spend 15 minutes prepping each package, you’ve just put $5 of your time into that package. Those hours add up and can throw off your spend per package… which is why a little custom printing can quickly pay for itself.
Back to you
There are countless ways to delight your customers and grow your brand using stickers and other custom printed products. Check out more ways Sticker Mule can help your business grow.
Comments