When designing your custom transfer sticker, there are a few simple guidelines to ensure the best possible quality.
How do I prepare my file?
File preparation is completely optional. Feel free to upload your design as it is, and we’ll make any required modifications before sending you a proof. You can also download our transfer sticker template and open it in Adobe Illustrator.
What colors can you print?
If you are ordering full color printed transfer stickers, we can print your design in any color, and there are no limits to the number of colors your stickers can have.
What size should my design be?
Before making adjustments, make sure your design is scaled to the correct size.
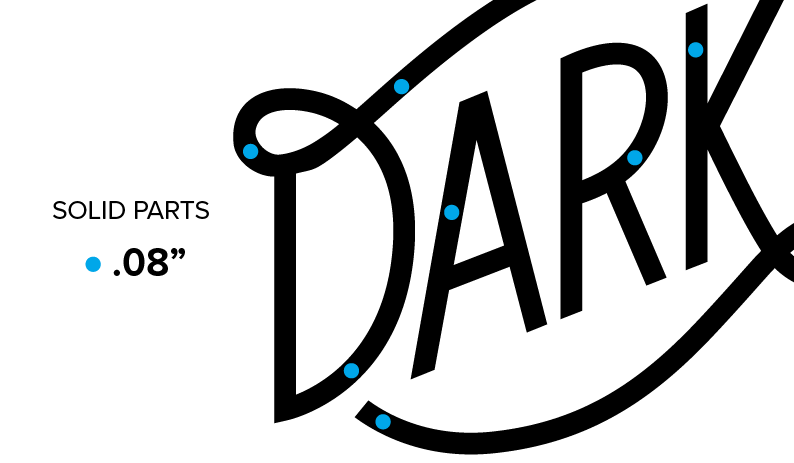
The solid parts of your design represent parts of the sticker. To ensure all parts will be preserved, be sure that you can fit a 0.08” circle within the object.
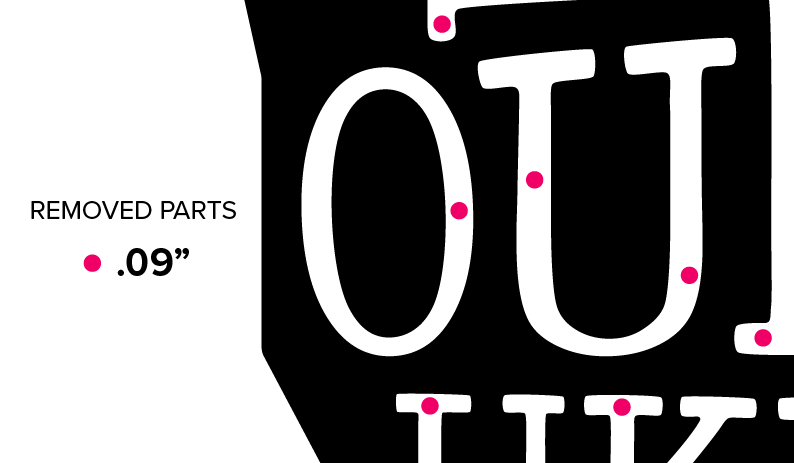
The ‘white space’ in your design is what will be discarded. For any area that is white space, you should be able to fit a 0.09” circle within that space.
Can you make my photo into a transfer sticker?
Yes! If you are ordering full color transfer stickers, we can make your photo into a printed transfer sticker. Just upload your image and we'll handle the rest. We may make light edits for print quality, but we'll always show you a proof before anything goes to print.
Need some inspiration? Check out these 15 awesome transfer sticker designs!
Related article: Why won't my design work as a printed transfer sticker?
Comments